Lab 06 - Work with RUNTIME parameters
Into this Lab we are going to work with RunTime parameters using JSON Queries in order to provide a message to the user when the job has been finished
This exercise will walk through:
- Define new Runtime parameters.
- Define a Post Execution Step
- Test the modifications.
- Deploy the new version of the Plug-In
- Run in Control-M
Step 1 - Define new Runtime parameters.
- Go back to our Application Integrator module and open the AAPIWEATHER Plug-In
- Into the Execution Steps select Execution - GET WEATHER and on the right pannel click on Output Handling

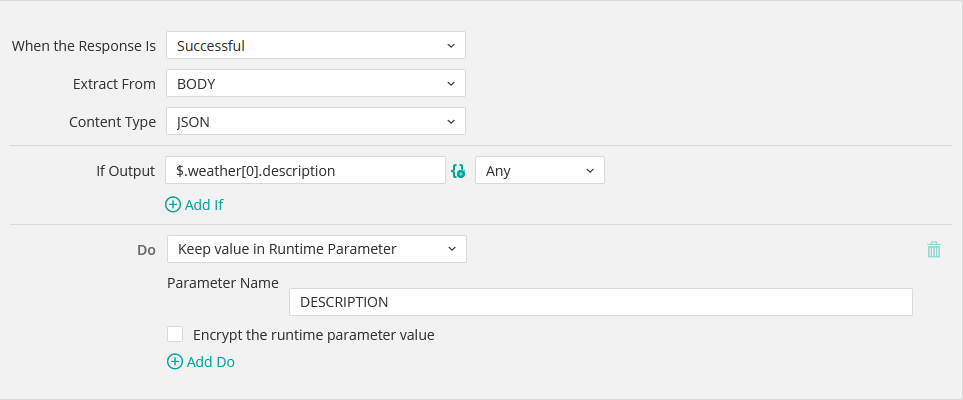
- Click on the icon
 to create a Runtime paramenter and add the following configuration.
- When the Response Is: Successful
- Extract from: BODY
- Content Type: JSON
- If Output: $.weather[0].description & Any
- DO: Keep value in Runtime Parameter
- Parameter Name: DESCRIPTION
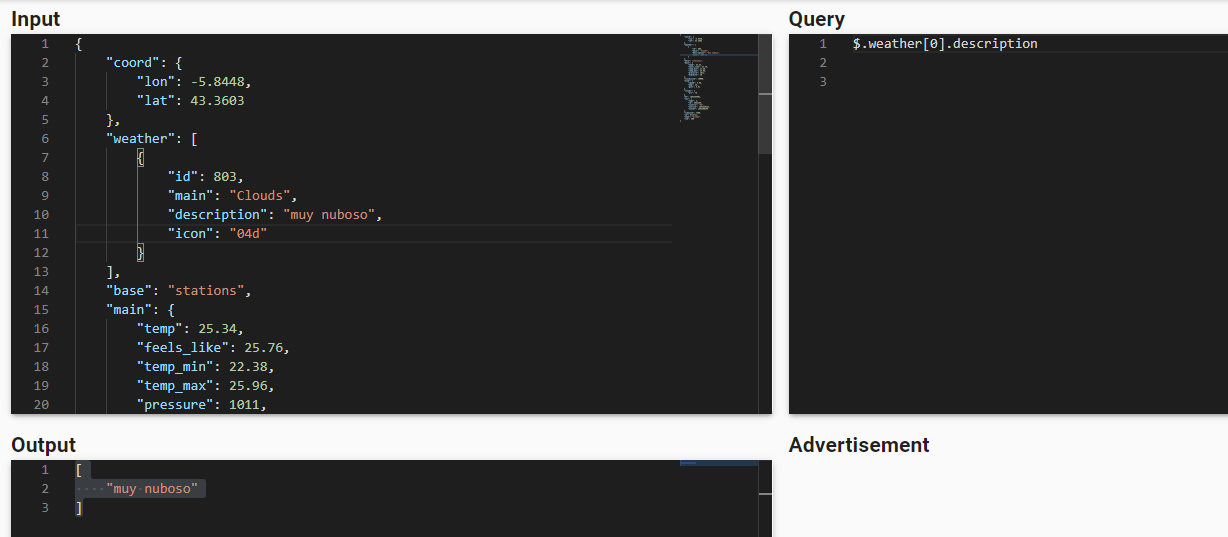
Note: To find out how to get specific values about an answer in JSON format there are different web tools (for example https://www.jsonquerytool.com/) where you can paste the answer in the page and test your variables using JSON Query.
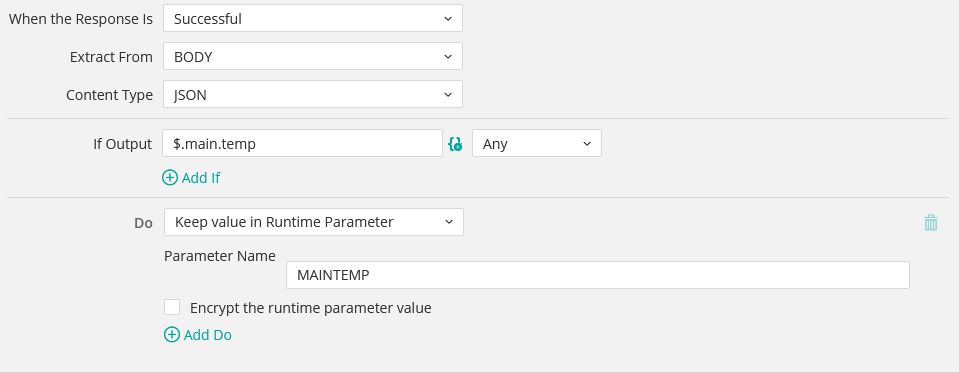
- Add a new runtime parameter using the icon with the following values.
- When the Response Is: Successful
- Extract from: BODY
- Content Type: JSON
- If Output: $.main.temp & Any
- DO: Keep value in Runtime Parameter
- Parameter Name: MAINTEMP
- Create the last Runtime parameter click again on the icon and add the following values.
- When the Response Is: Successful
- Extract from: BODY
- Content Type: JSON
- If Output: $.main.feels_like & Any
- DO: Keep value in Runtime Parameter
- Parameter Name: FEELTEMP

- Save the modifications applied.
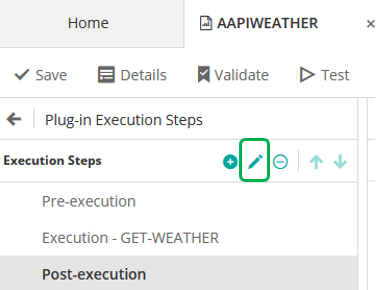
Step 2 - Define a Post Execution Step
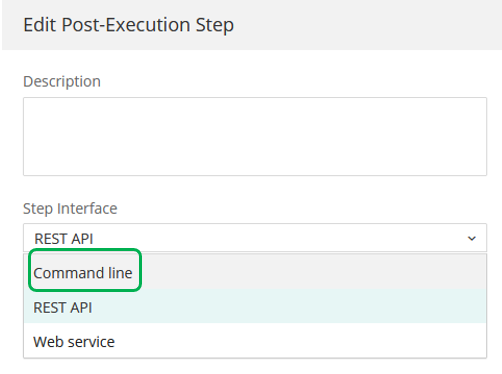
- Into the left panel select the step Post-Execution and click on the pencil icon.
- From the Step Interface configuration change to Command Line
- A new message will appear click on Change
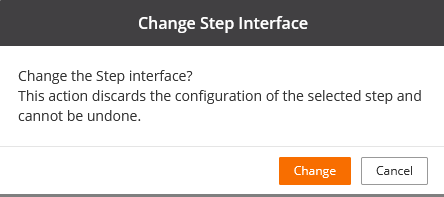
-
Finally click on Save (bottom right corner)
-
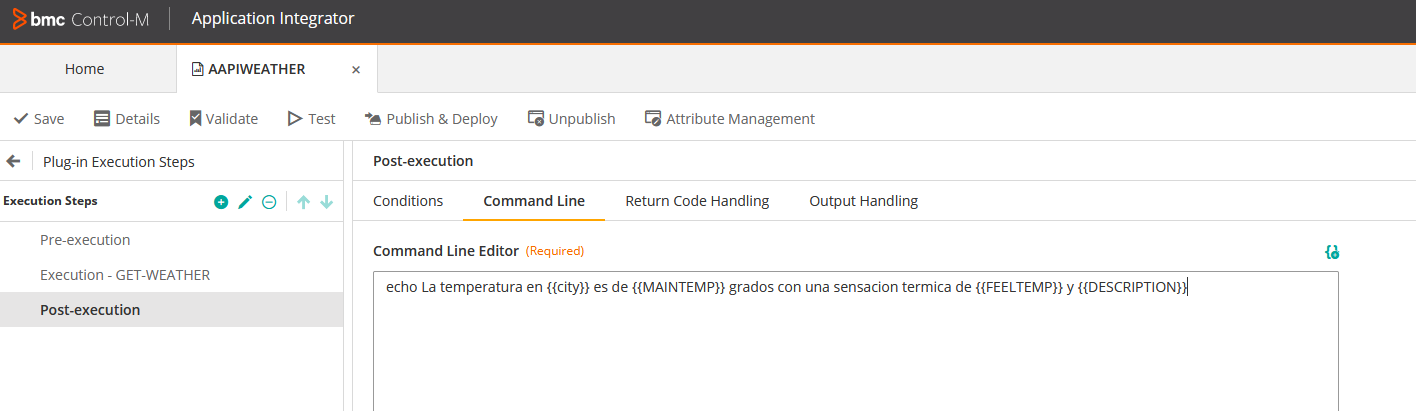
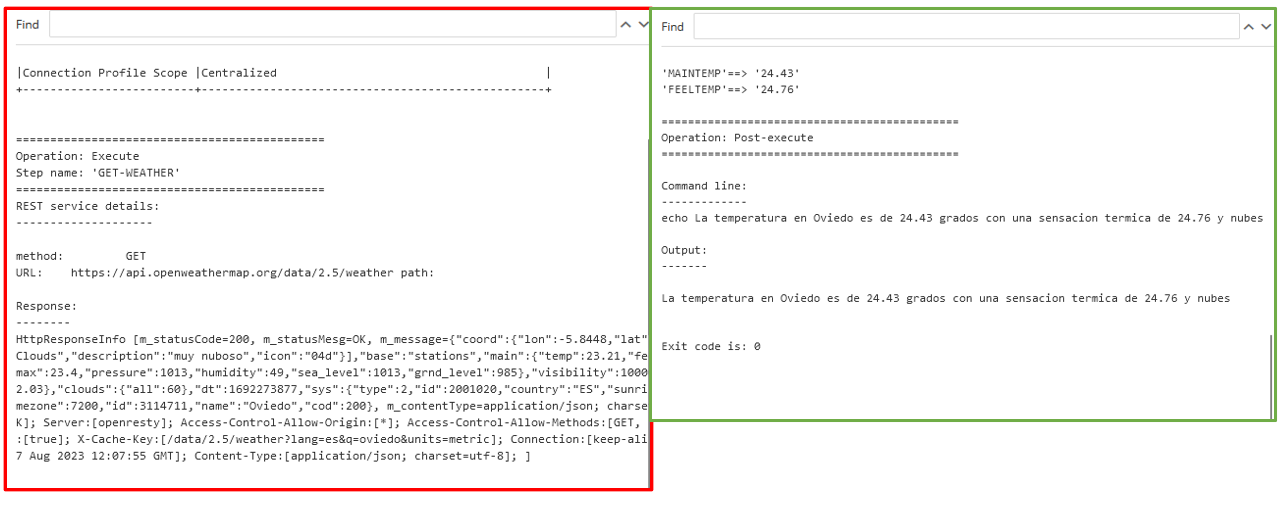
Into the Post-Execution step click on the tab Command Line and into the command line editor include the following:
- echo La temperatura en {{city}} es de {{MAINTEMP}} grados con una sensacion termica de {{FEELTEMP}} y {{DESCRIPTION}}
- Enable the option "Append command standard output to job output"
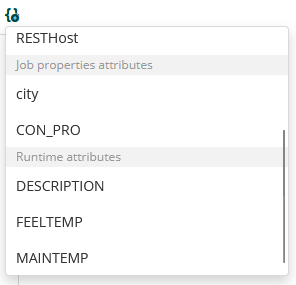
Note: As we have mention into previous Labs you can use the option Insert Attribute to insert the attributes defined inside the job.
- Validate the changes applied

- Save the changes applied.

Step 3 - Test the modifications
- Click on Test and under the Test Definition
- Testing Agent: select the agent designated.
- key: <should_appear_autocompleted>
- RESTHost: <should_appear_autocompleted>
- Ciudad: <enter_the_city_of_your_choice>
- Click on Run Test
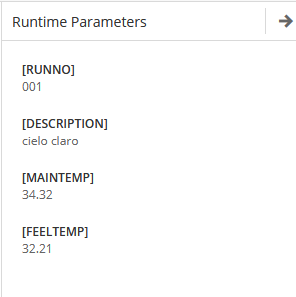
- Into the right side under the Runtime Parameters sections should appear our Runtime parameters defined.
- Into the Test Log if we select the Post-Execution and we expand the output execution we will see the output of the command line defined in this step.

- Close the Test tab.
Step 4 - Deploy the new version of the Plug-In
Now we are going to publish and deploy the new version of this Plug-in
- click on

- Enable the option Publish Plug-In
- Select the Agent designated for this Plug-In.
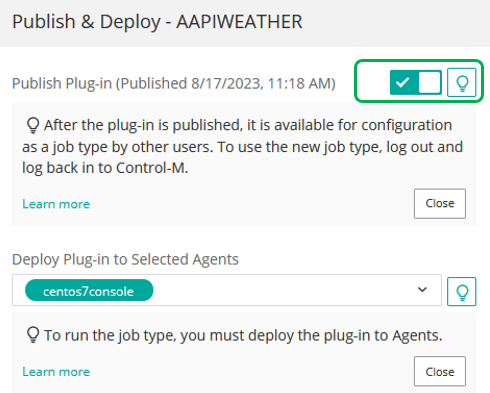
- Click on Apply
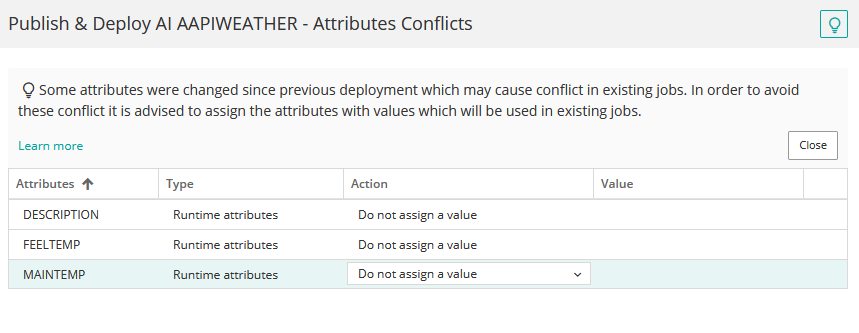
Note: If you receive a message warning about the runtime parameters click on Review Conflicts.
Add the following configuration for the runtime parameters
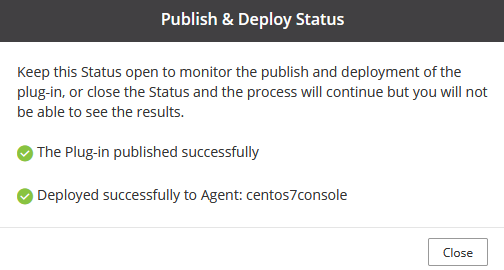
- Our Plug-In has been updated.
Step 5 - Run in Control-M
- Under Control-M Web logout and login to refresh the changes.
- Under Planning domain select Folders and Jobs
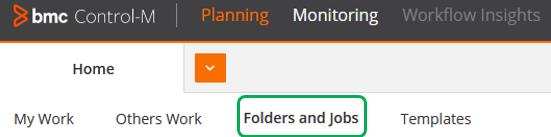
- Open the folder user01-rest-api
- Under the Workspace opened click on Run and select workspace.
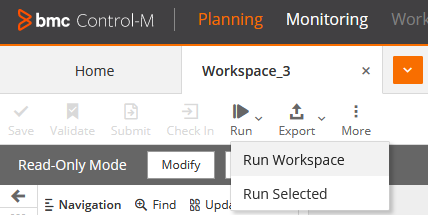
- Use the default values and click on Run
- Move to Monitoring domain open the viewpoint created previously user01_folders
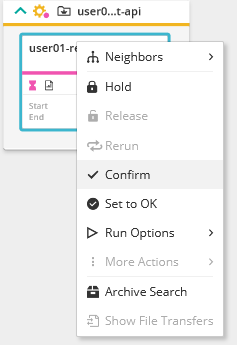
- Under the job pending of user confirmation right click over the job and Confirm
- Our job will be executing and wait to be completed.
- Select the job go to Output tab and scroll down to see the result.
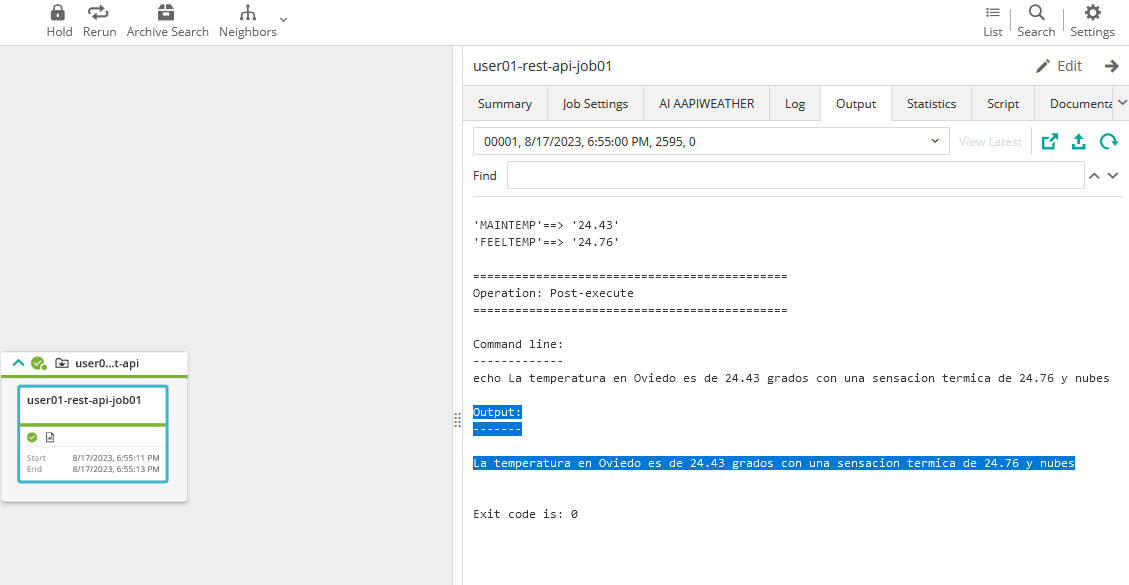
- Compare the output differences between job executions.
Summary
In completing this lab, now you have the knowledge to run your Application Integrator JobTypes in Control-M defining and working with Runtime Parameters. Please continue to Lab 07 In which we proceed to work execution steps.